Build a Metamodel
In Mimris you are free to define your own modelling language (metamodel) that suits your needs and requirements. This is a beginners guide to how you can do just that. You start by opening the model file “CORE-template_PR.json”.
Click on the left top Hamburger menu button then select the "NEW PROJECT" menu.
Click OK to continue if you don't need to save the current model.
Click "LIST MODEL TEMPLATES" and then "Select Model:"
Choose the model ***CORE-Template_PR.json***.
The left part of your screen should look like the following:
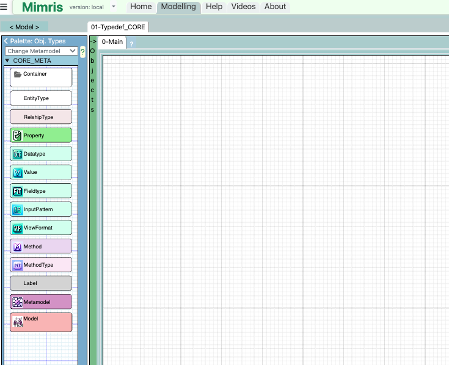
The left column contains all the object types you need to define your own metamodel.
The most important type is “EntityType” which is used to define new object types. You drag it into the right pane, drop it and give it the name of your new type. Then you go on to define your next object type and so on.
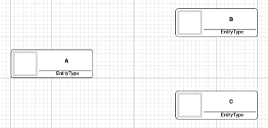
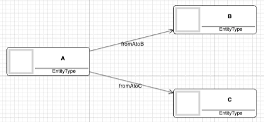
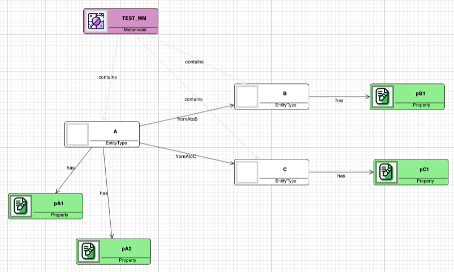
Below is an example with 3 new object types: A, B and C.
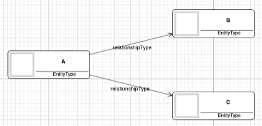
When your object types are modelled, let us go on to the relationship types between the object types. This is done by drawing a relationship of type “relationshipType” from A to B and from A to C (see below). But the names of the relationship types need to be changed to the actual relationship types. This can be done by clicking the text on the relationship to make it editable and then it can be changed.
Change the relationship names to “fromAtoB” and to “fromAtoC”, as shown below.
Now you have defined the content of your first Mimris metamodel, except you need to specify what metamodel it is meant to be part of.
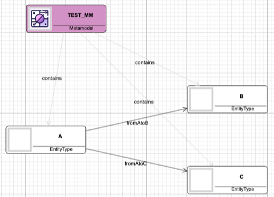
To do that you need to drag in another type, the “Metamodel” type and drop it somewhere in your model. Change the name to your metamodel name, as in our example is “TEST_META”. Then drag relationships of type “contains” from the Metamodel object to each of the object types, as shown below. This is all you need to be able to create your first Mimris metamodel.
Now right-click the metamodel object and choose “Generate Metamodel”. A dialog appears that asks you to confirm that you want to generate the metamodel. When done you should get a message saying : “The metamodel TEST_META has been successfully generated!”
That is all. When this is done, you are ready to test your very first metamodel in action.
Build a test model
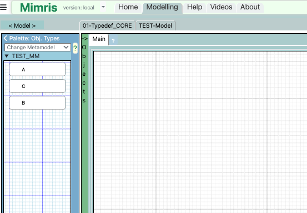
First, right-click the background to open up the background menu and choose “New Model”. You will be asked to “Select Metamodel”, click on “Select…” and choose “TEST_META”. Then you will be asked to enter a model name. You enter a name of your choice and click OK. The screen will change to something like this:
Now build your test model to verify that the metamodel has been generated according to your metamodel definition. E.g. something like this:
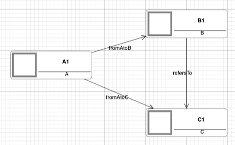
The names of the objects have been edited while the relationship names are unchanged. Note the relationship from B1 to C1 of type “refersTo”, which is a type that is included in all metamodels by default.
Adding properties to your types
To add properties to the types we need to go back to our metamodel. In the diagram below type A has got two properties, pA1 and pA2, while B and C have got one property each, pB1 and pC1.
When you have modeled this, you should do another “Generate Metamodel” and choose “TEST_META” as before. When done, go back to your test model and open the property dialog on each of the objects to verify that the properties have been added to the corresponding types.
E.g. the property dialog of A1 now looks as follows:
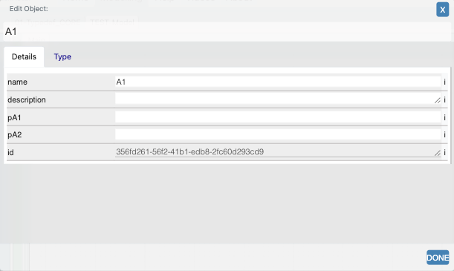
A1 has now properties pA1 and pA2 as modeled in the metamodel.
Properties and Datatypes
Properties may be of different datatypes. But if not given, the datatype is string. In the example given above datatypes are not specified, i.e. the datatypes are all string, which implies that property values will accept all datatypes.
If we in the example above specifies that property pB1 is of type float as shown below, the value given by the user will be checked and an error message will be given if the value is not a number.

Note: When we drop a Datatype object in the model a dialog will appear that asks us to give the datatype a name. The dialog shows a suggested value of the form: “datatype” + a generated number, such as “datatype23”, which of course has no meaning to us.
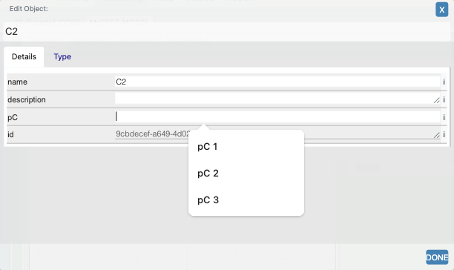
It is recommended that you change the name to a name that has a meaning to you. It could be one of the datatypes that are supported out of the box, like “string”, “integer”, “float”, but then it assumes no further restrictions. If we in the example above specifies that property pC is of a type that has three allowed values, we could do as shown below:
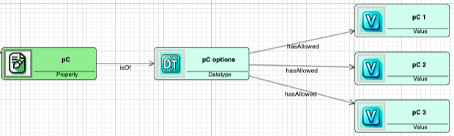
We give the datatype the name “pC options” that has three allowed values. The datatype name must be unique within the project, and the datatype could be used in other contexts.
Then, in the property dialog of an object of type C the behavior would be like the following: